|
|  |
| Notices |
Welcome to the sSnakeSs community. You are currently viewing our boards as a guest which gives you limited access to view most discussions and access our other features. By joining our free community you will have access to post topics, communicate privately with other members (PM), respond to polls, upload content and access many other special features. Registration is fast, simple and absolutely free so please, join our community today! If you have any problems with the registration process or your account login, please contact contact us.
|
 09-19-16, 06:29 AM
|
#1
|
|
Member
Join Date: May-2014
Location: Huntsville, AL
Posts: 1,042
Country: 
|
Re: FW's (mostly) DIY Snake Room. (Pic heavy)
Good stuff, man. Love the cottonmouth photo. And keep us updated on the coachwhip. It has recently crossed my to try to collect a couple of neonate racers and see if I can acclimate them to captivity. You just don't see cbb racers.
__________________
...the old ones ... knew in their bones... that death exists, that all life kills to eat, that all lives end, that energy goes on. They knew that humans are participants, not spectators. -- Stephen Bodio, On the Edge of the Wild
|

|
|
|
09-19-16, 10:23 AM
|
#2
|
|
Member
Join Date: Mar-2014
Location: Victoria, TX
Age: 40
Posts: 774
Country:
|
Re: FW's (mostly) DIY Snake Room. (Pic heavy)
Quote:
Originally Posted by eminart

Good stuff, man. Love the cottonmouth photo. And keep us updated on the coachwhip. It has recently crossed my to try to collect a couple of neonate racers and see if I can acclimate them to captivity. You just don't see cbb racers.
|
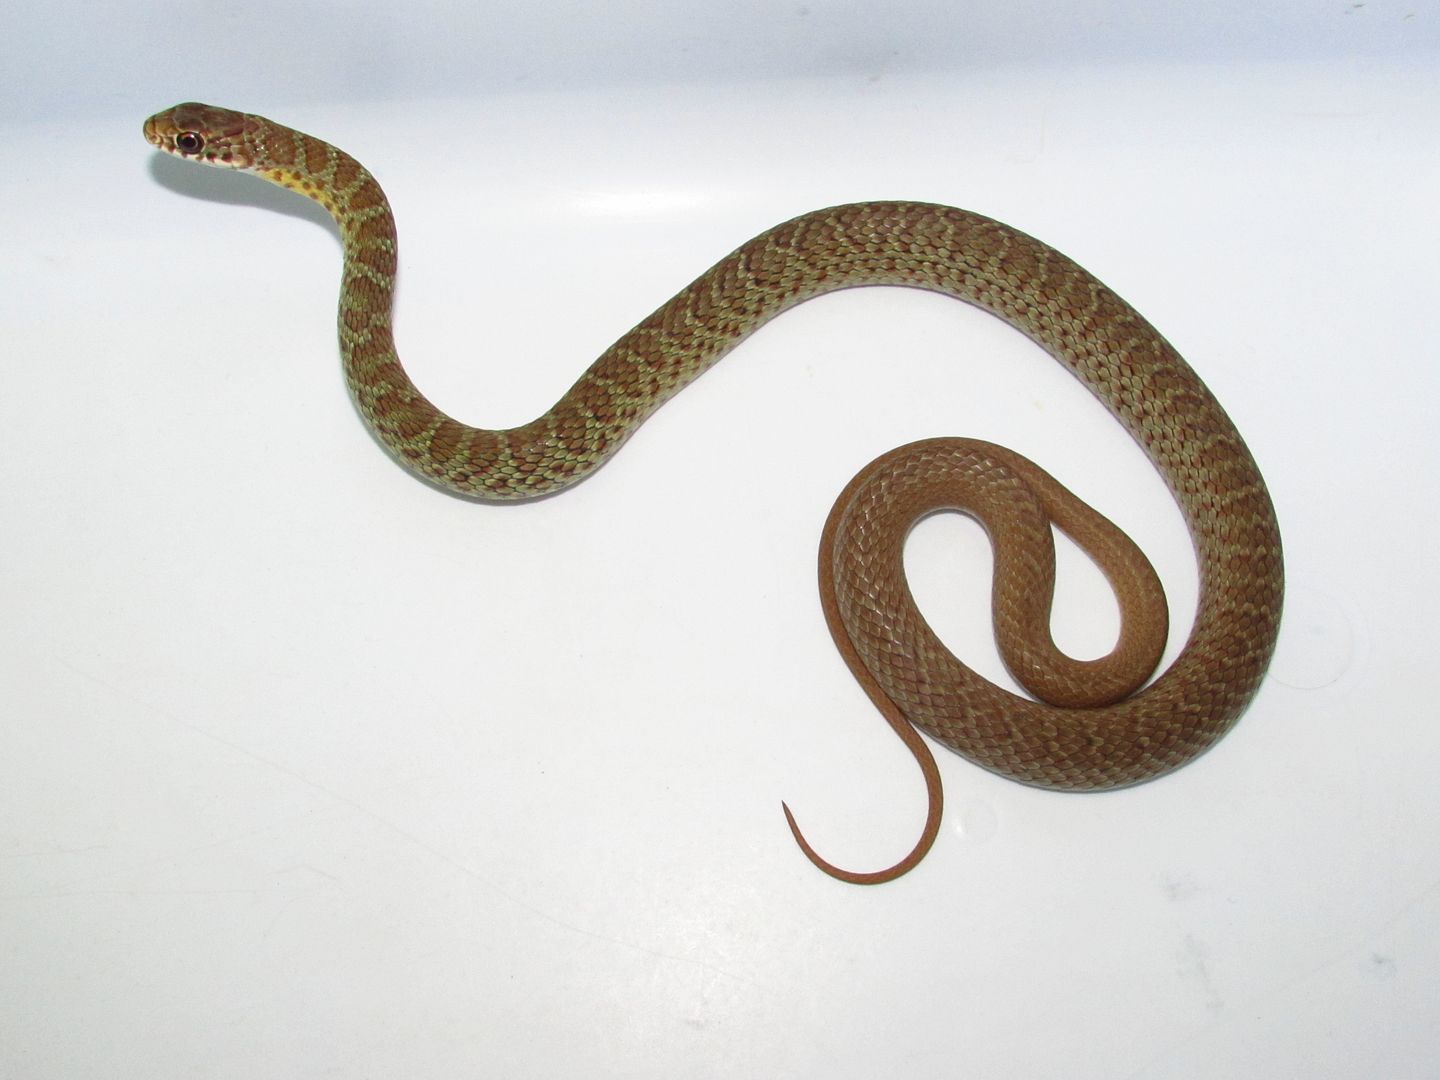
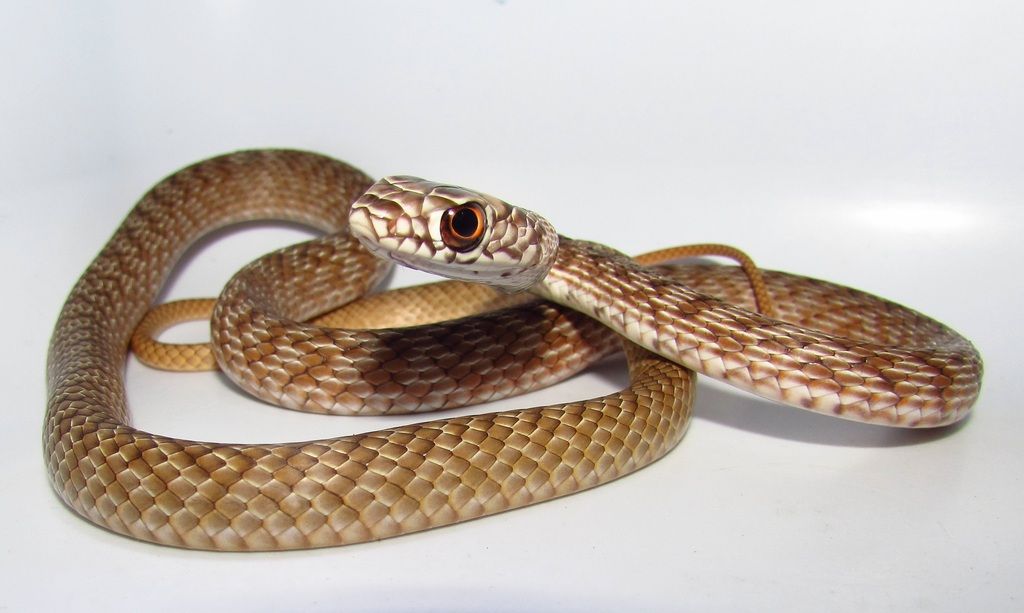
Indeed not, Coluber are unfortunately unpopular in the trade. That's why I jumped on the Eastern Coachwhip. They have reputations for being extremely flighty, bitey, and hard to get feeding. All of these issues are much easier to deal with when you start with a hatchling, and would probably become much less pronounced after a few generations in a captive breeding program. People who do keep them say they are relatively intelligent, very alert and active, and very food oriented once established. The picture above is a yearling Eastern Yellowbelly Racer I collected as a hatchling last year. The first thing I noticed was that it was not very "stretchy," that is to say that it had trouble getting even the tiniest of newborn pink mice down. This is no Rat Snake or Python. And if it had any trouble it was very quick to spit it out. So I started feeding it the thighs of adult mice, that worked much better. The first few weeks it took to assist feeding pretty well, as long as I held the snake in my hand until it got the mouse leg down, and as long as I didn't move a muscle. Some days it extremely nervous and spit the food item out repeatedly until I gave up and force fed it, some days it gobbled it down with such tenacity you'd think it was angry with the mouse leg. Before long it took to tease feeding, as long as I held it in hand so it couldn't run. As it grew I would tease feed it the first mouse leg, then follow it with additional legs as it ate so it ate them in one long piece, as if it were eating a snake. Currently it takes rat legs or small fuzzy mice off the tongs in its tub. Sometimes it does still take a bit of teasing, but once it grabs the food item you're not getting it back lol. I keep it in a larger tub than I would a Kingsnake or other colubrid, but otherwise care is very similar and very easy. I definitely wouldn't recommend one to a newbie, but with a little patience and know-how I think these guys will make great captives. I'm excited to how they behave as adults, they should be great display animals as active as the are.
__________________
Science. It reduces the stupid.
Last edited by FWK; 09-19-16 at 10:32 AM..
|
|
|
|
|
09-19-16, 01:12 PM
|
#3
|
|
Member
Join Date: May-2014
Location: Huntsville, AL
Posts: 1,042
Country:
|
Re: FW's (mostly) DIY Snake Room. (Pic heavy)
Thanks for the feeding info, FWK. That may come in handy if I ever do try a racer. I agree with you that the racers and coachwhips should make interesting captives due to their diurnal habits and high activity. That's the main reason I've been thinking about this. I think they're very underrated, probably because most people want something to cuddle with, and due to how common they are in the wild (racers, at least).
__________________
...the old ones ... knew in their bones... that death exists, that all life kills to eat, that all lives end, that energy goes on. They knew that humans are participants, not spectators. -- Stephen Bodio, On the Edge of the Wild
|
|
|
|
|
10-07-16, 02:39 PM
|
#4
|
|
Member
Join Date: Mar-2014
Location: Victoria, TX
Age: 40
Posts: 774
Country:
|
I have power!
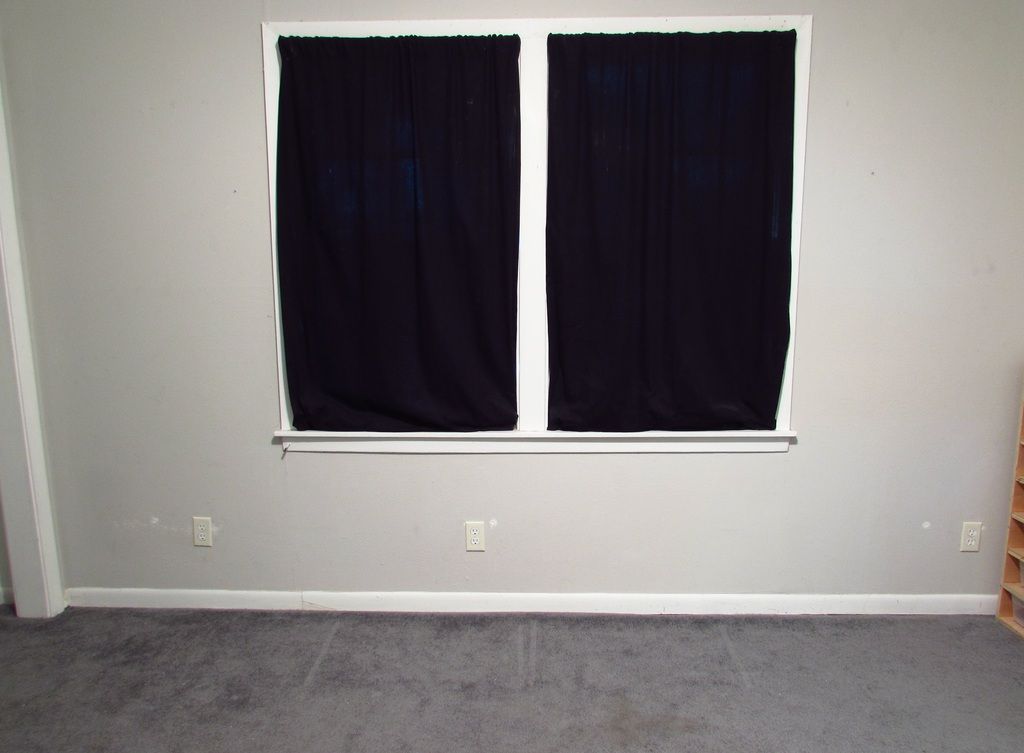
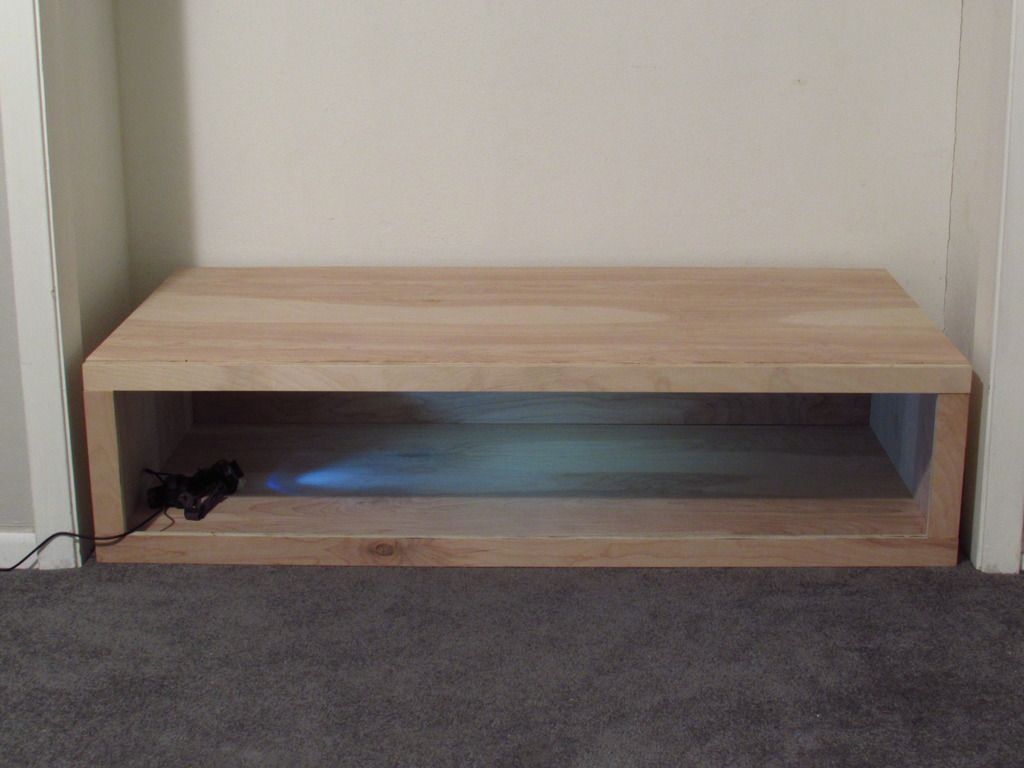
A small, but important, update; I have power! My dad helped me with this job. He's a former general contractor, he helped me remodel the house when I moved in some eight years ago. Rather than crawl about in the attic to bring additional power to the interior walls, we just drilled through the exterior wall, through the mortar between bricks, to bring power in directly from the main breaker box that is mounted to the wall to the left of the window there. It was quick and easy, he has a massive concrete hammer drill that blasts through mortar like it's nothing. I still need to do a bit of touch-up painting to cover the spackling patching the holes where we initially drilled through, though it is hardly noticeable in person. Now I just have to build some new enclosures to take advantage of the extra power! I have a few projects lined up, including adult sized enclosures for the Taiwanese Beauty and Dumeril's Boa that will fit neatly in the closet (the door frame you can just see to the left there). I've already got materials stacking up, just waiting for cooler weather, and the end of the herping season, to get to work in earnest.
__________________
Science. It reduces the stupid.
|
|
|
|
|
10-08-16, 01:01 AM
|
#5
|
|
Member
Join Date: Sep-2014
Posts: 1,252
Country:
|
Re: FW's (mostly) DIY Snake Room. (Pic heavy)
When we moved into this house I had multiple new outlets installed in the basement for my aquariums, with a GFCI incorprated into each of the 3 new lines (6 duplex on each) wired into the breaker box. Works out better now that I've mainly switched over to snakes, since each enclosure doesn't require separate filters and lighting along with the heat source, and each herpstat 4 or Helix regulates multiple heaters.
Never thought of keeping enclosures in the closet, I just line a couple the basement walls with them.
__________________
7.6.26 Dominican red mountain boas, 1.1 carpet pythons, 3 ATB, 1.1 climacophora, 1.1 Russian rats, 1.1 prasina, 1.1 speckled kings, 3.3.1 corns, 1.1.1 black rats, 1.1 savu, 1.1 Stimson's, 1 spotted python, 1.1 Boiga nigriceps, 3 Olive house snakes, 1 Sonoran mountain king, 0.1 Sinoloan milk snake, 1.1 Dione rat snake.
|
|
|
|
|
10-09-16, 10:11 AM
|
#6
|
|
Member
Join Date: Sep-2016
Location: S.C.
Posts: 280
Country:
|
Re: FW's (mostly) DIY Snake Room. (Pic heavy)
Great thread! Thanks for sharing pics of your awesome collection, and the great hide ideas. The pallet hides, the water bowls (could be a swimming pool for bean!), the PVC pipe... Great stuff.
Congrats on the power!
__________________
Whatever I said, I said it with a smile
|
|
|
|
|
11-07-16, 12:56 PM
|
#7
|
|
Member
Join Date: Mar-2014
Location: Victoria, TX
Age: 40
Posts: 774
Country:
|
Triplex build
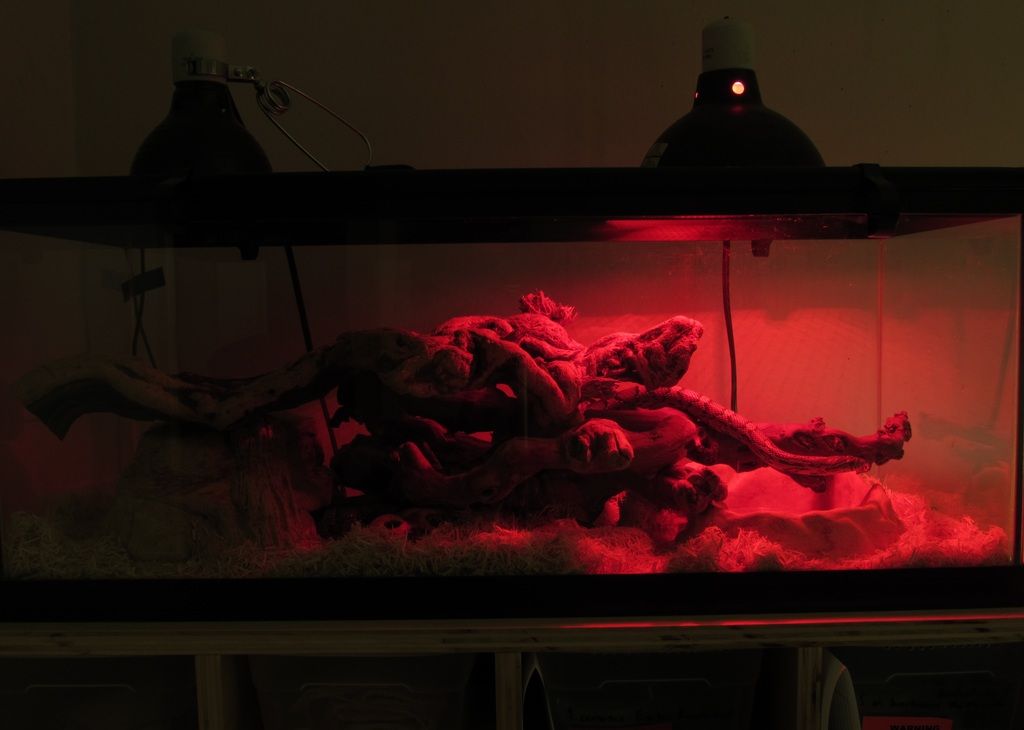
My buddy, the one whose Corn Snake I've been babysitting, finally got a new place and picked up his Corn. I enjoyed looking after the snake, but I'm very happy to see that enclosure go away. Time to build something much more efficient to take its place! After much brainstorming and some doodling I came up with a design I liked, a Triplex! Three enclosures stacked in a single unit. A total height of 27 inches, width of 33 inches, and depth of 14 inches gives each enclosure dimensions similar to a 41 quart tub, just a bit taller. They will have sliding glass doors, be lit with LED strips, and heated with 11 inch flex watt heat tape under the floor on the right side. I'll have the lights on a timer, and each enclosure can be independently thermostat controlled, or wired together on a single thermostat .

The final design concept for this build, as laid out in my notebook filled with many such plans.
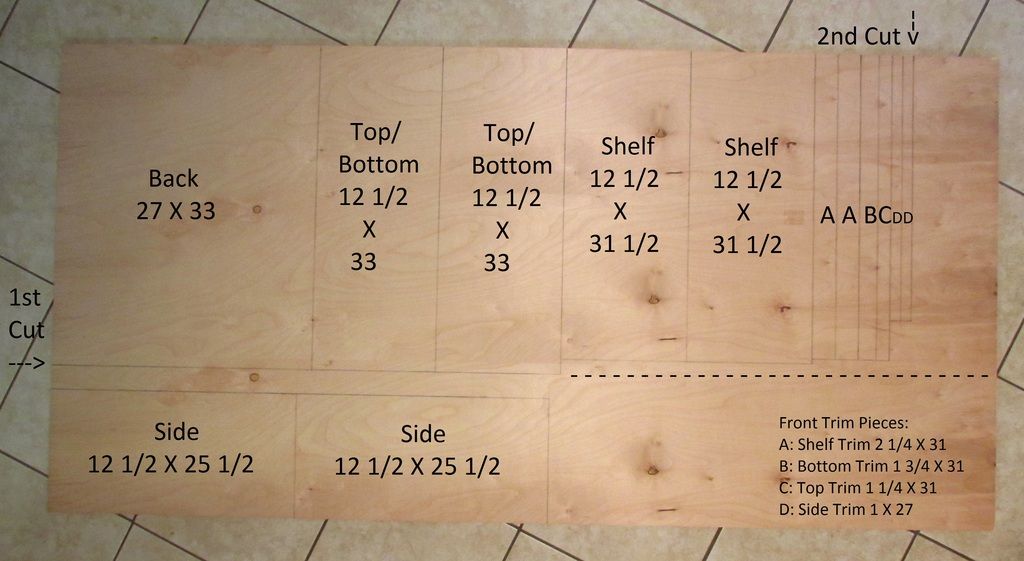
The cuts drawn out on a 4x8 sheet of Birch plywood. Always awesome when a whole project can be cut from a single sheet of plywood. There are a lot of ways to draw this one up really. I drew this with the very small trim pieces in mind, small pieces can be really tough to cut with a circular saw. Remember to account for the width of your saw blade when drawing your cuts. The lines here are drawn 1/16" thick to accommodate the hollow ground, 7-1/4" x 140 tooth plywood blade on my circular saw. The first cut is a full length rip along the largest pieces, then on through the sheet (the dotted line). After the first cut start cutting the smallest trim pieces off first, it is much easier to cut small pieces off of a large piece than try to split a small piece into even smaller pieces (unless you have a nice table saw, which I do not. Yet. This project convinced me it's about time to invest in a table saw). Once all the pieces are separated, trim off the excess and you're ready to start sanding.
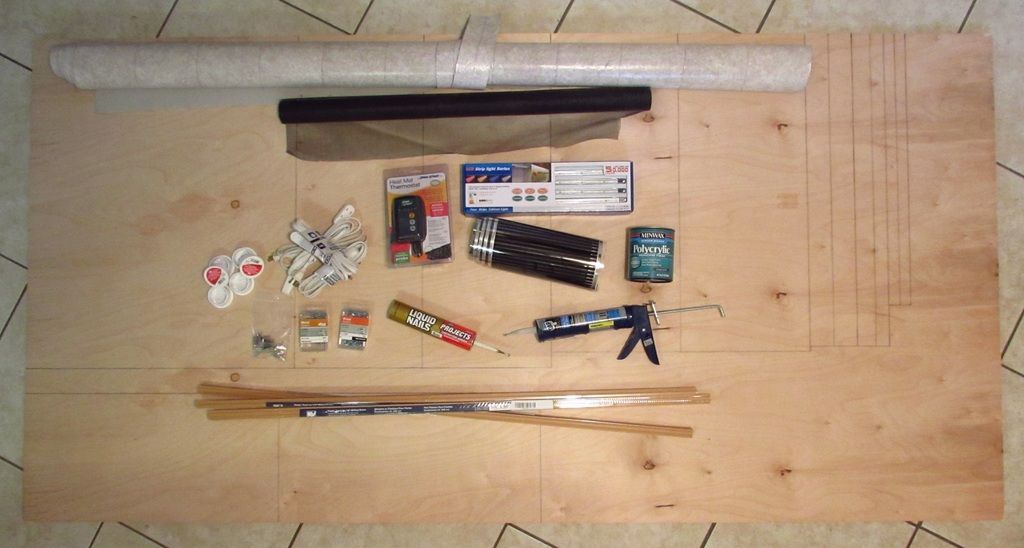
A pile of parts and materials. This oughta be fun. Just about everything is needed is here, save electrical tape (because I forgot) and the glass for the sliding doors. I didn't get the glass cut until the enclosure was built, just in case I needed to make adjustments along the way.
Materials list:
One 4x8 sheet of 3/4 inch Birch plywood
1-1/2 inch #8 wood screws
Minwax water based Polyurethane
Linoleum flooring
Three feet of 11 inch heat tape
Six heat tape connectors
Electrical tape
Extension cords (to wire the heat tape)
LED light strips
Six 2 inch drains (for ventilation)
Hardware cloth (to cover the vents)
1/2 inch #6 wood screws (to install the vents)
Silicon to install the lights, tack down the heat tape and Linoleum flooring, and seal all interior seams
Six 6 x 16 inch panes of 1/4 inch glass
Glass track
Glue for the glass track (I use Liquid Nails)
Thermostat(s) for the heat tape
__________________
Science. It reduces the stupid.
|
|
|
|
|
11-07-16, 01:01 PM
|
#8
|
|
Member
Join Date: Mar-2014
Location: Victoria, TX
Age: 40
Posts: 774
Country:
|
Triplex build
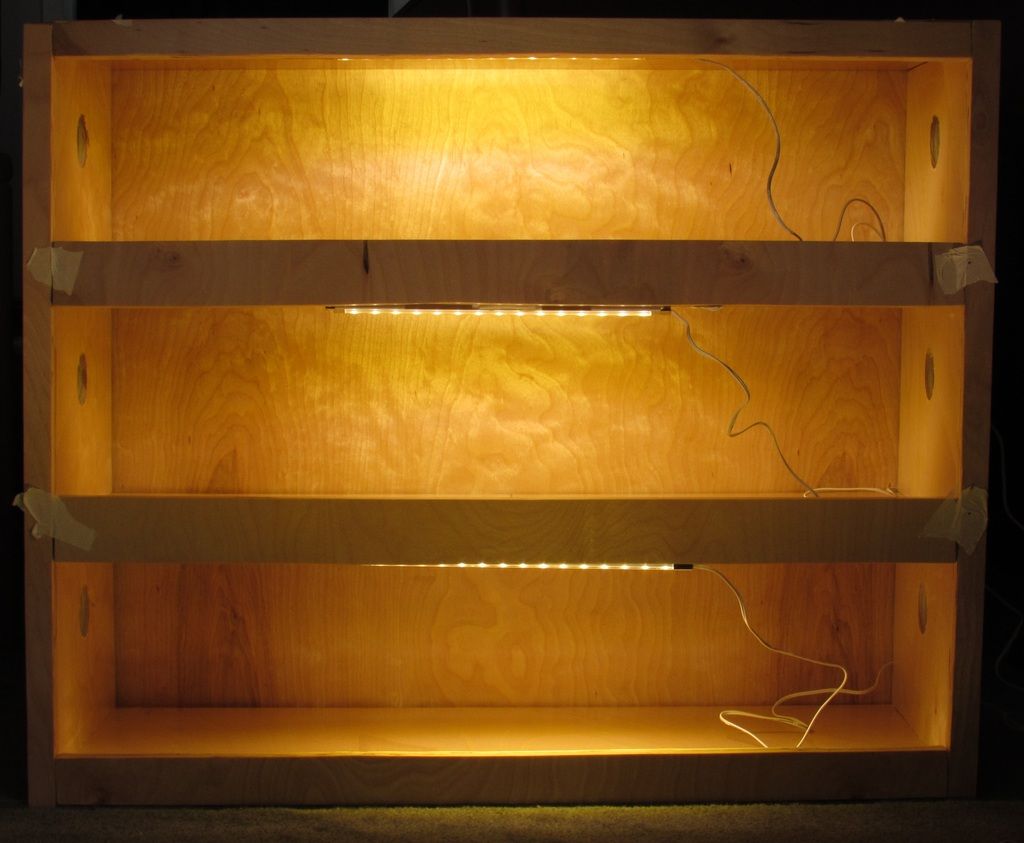
After cutting the pieces, sanding them down, and painting them with polyurethane, I attached the sides to the base with three screws each (use a 1/8 drill inch bit to drill pilot holes for all screws), then attached the top and installed the two shelves, being careful to keep everything square. Here I test fit the front trim and back on the main assembly, and check to see how the LED lights look. Turns out the lights are more directional than I expected, I'm going to need to make a mount to angle them towards the center of the enclosure floor.
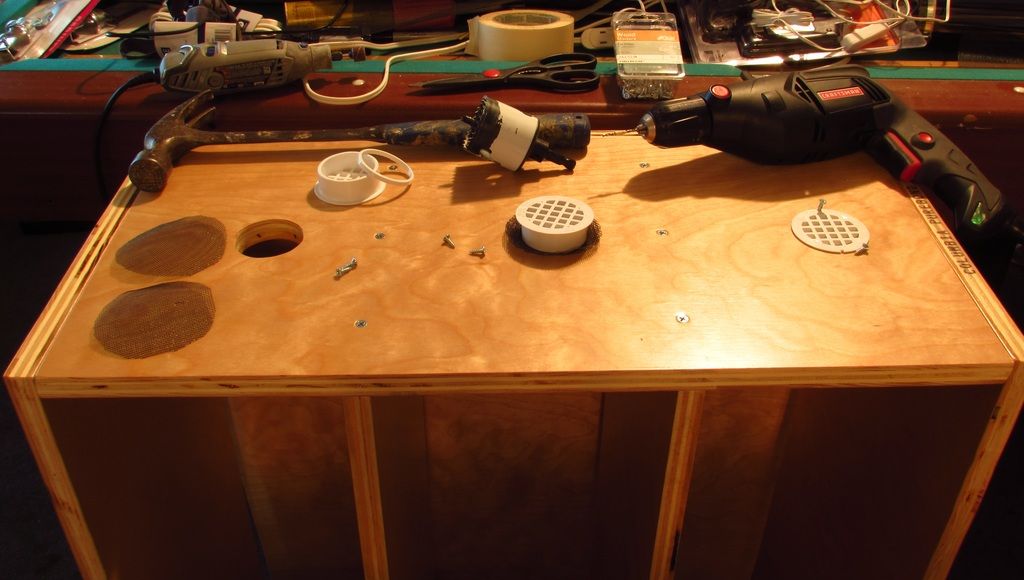
There are many ways to go about providing ventilation. I like these two inch plastic drains. A two inch hole saw cuts the initial hole, which then needs to be widened a bit with a Dremel to perfectly fit the slightly tapered drain. After test fitting the drains to ensure a perfect fit, apply a couple coats of polyurethane to seal the freshly exposed wood. The drains sit one inch deep, so they need to be trimmed to sit flush with the 3/4 inch plywood. Once the drains are trimmed and the holes cut, I cover the drains with two layers of hardware cloth and hammer them into place. At this point they are pretty secure, but we are talking about the master escape artists known as snakes, so to be absolutely sure they cannot be pushed out I fix them in place with a couple half inch #6 wood screws. Drill a couple 7/64 inch pilot holes right at the edge of the drains flange to install the screws. Be careful not to drill the pilot holes too deep here, a bit of masking tape wrapped around the drill bit helps gauge a proper depth.
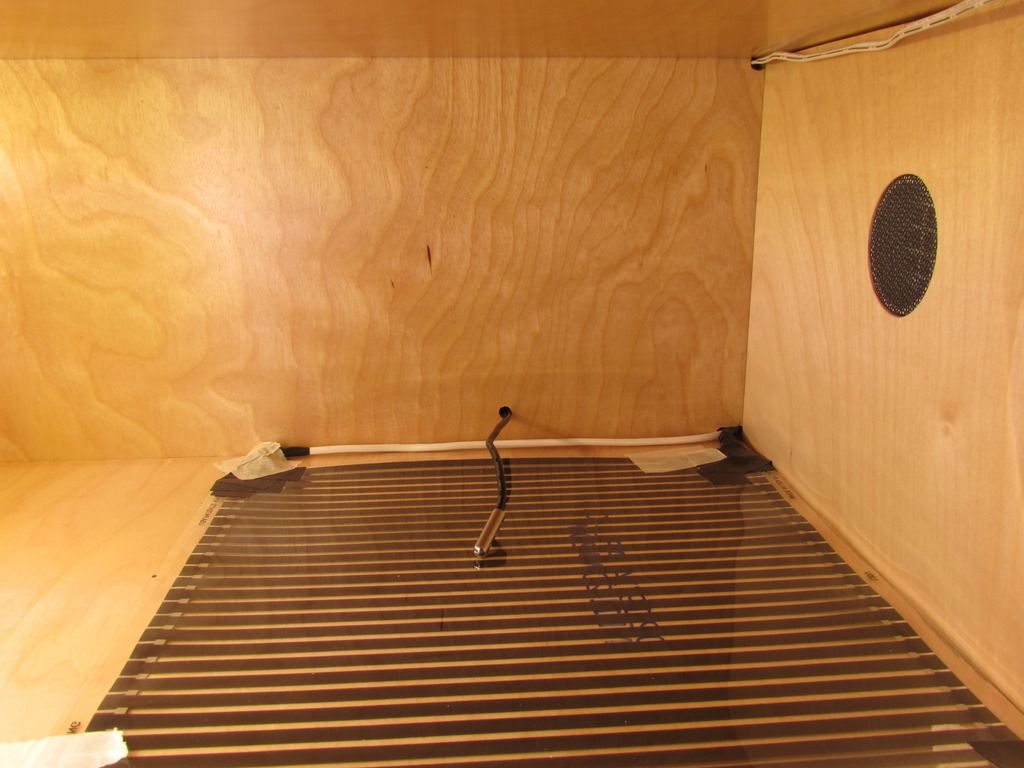
After installing the vents is was time to sort out the wiring for the lights and heat tape. I lined up the back and drew out the slot for the heat tape wires, the holes for the thermostat probes, and the the holes for the lights wires. The heating elements I assembled the same as always, cut the head off of a small extension cord, attach heat tape connectors to the cord with a bit of solder, connect the connectors to the heat tape, and seal it up with electrical tape. The heat tape has to go in as the back is installed, here it is temporarily held in place with masking tape. It will be thoroughly tacked down with silicon when I install the linoleum floor. Note that the wire leads are different lengths to allow the wire to be run out near the corner, to keep the slot for the wire as small as possible. Once the back was installed I installed the front trim, being careful to maintain a 6-1/2 inch gap for the glass doors all the way across all three enclosures.
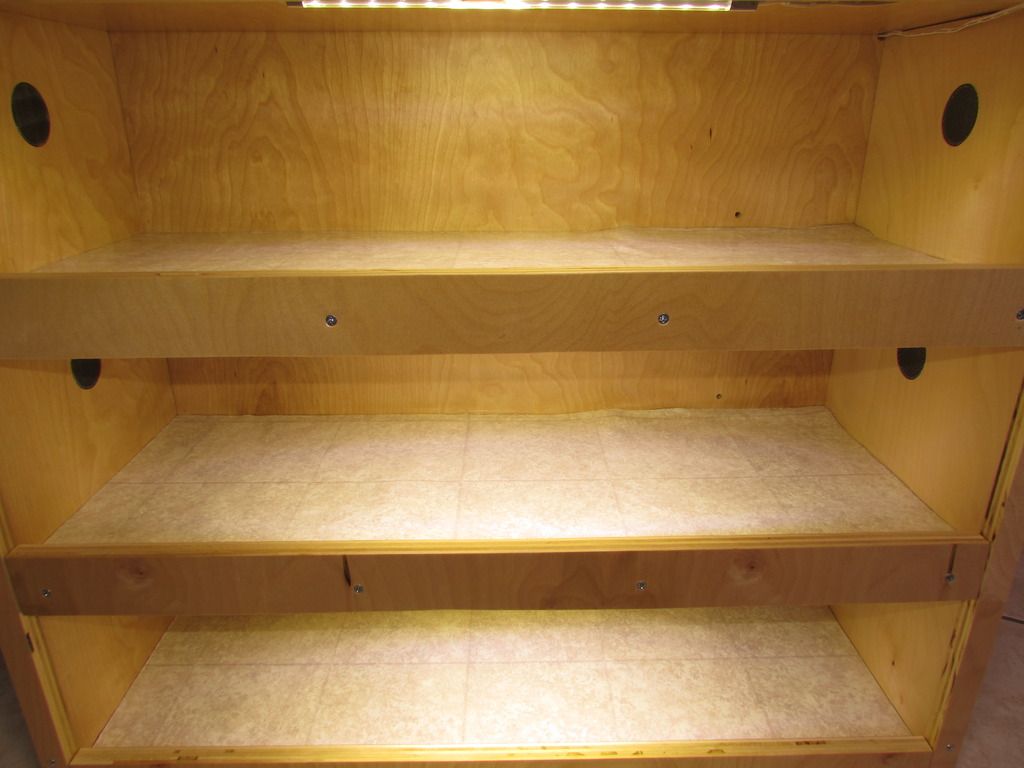
With the unit assembled, the next step was to install the linoleum floor. First I tack down the heat tape with silicon, making sure to apply plenty of silicon around the wiring for the tape. Then I tack the linoleum to the heat tape and floor with silicon, and weigh it all down until the silicon sets. Keeping the connectors and wire leads for the heat tape inside the enclosure, under the linoleum floor, does mean there are bumps under the floor in the back right corner. I did consider routing slots for the connectors and wire leads so the linoleum floor would sit perfectly flat, but decided not to bother with it.
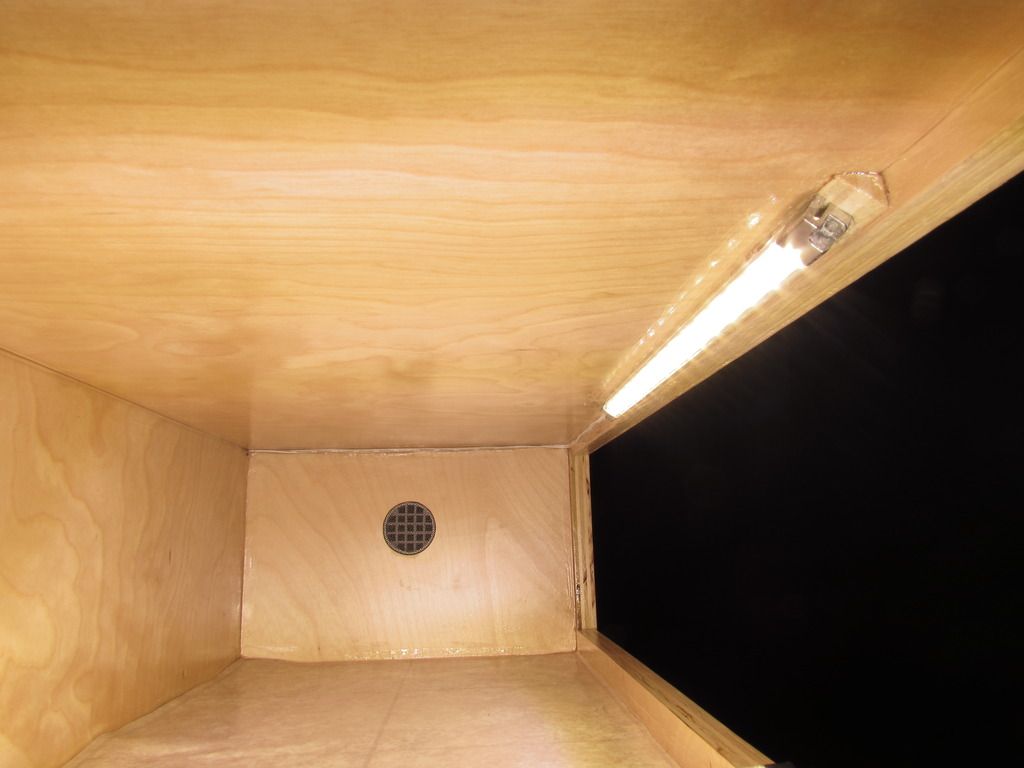
Once the silicon holding the floor cured, I set about the somewhat tedious process of sealing all the interior seams with silicon, installing the lights at the same time. You can see the mount I made for the light from a bit of scrap plywood, it angles the light towards the center of the enclosure floor. I ran a bead of silicon along the front top edge of the enclosure and pressed the mount into it, then ran another bead of silicon over the mount and pressed the light into it. I then ran a bead of silicon from the light, around the corner, and all the way to the hole for the lights wire, and pressed the wire into the silicon. I filled in the hole for the lights wire the rest of the way, and continued the bead of silicon along every interior seam, smoothing it out with my fingertip as I went along. The final order of business was to install the glass track. A fairly straightforward job, just cut the track to size, roughen the mating surfaces up a bit with sandpaper, apply a bead of Liquid Nails glue, and clamp the track in place until the glue is set.
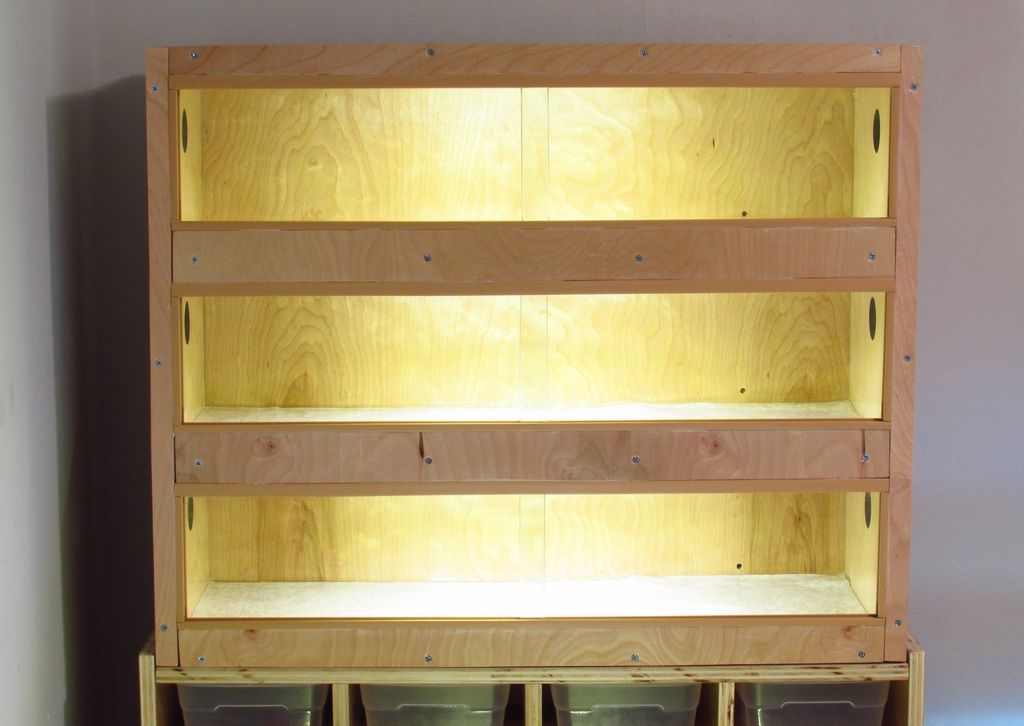
The completed enclosure in its place. Looks pretty nice really, though you can definitely see some sloppy cuts on the front trim. I think I'll get myself that table saw for Christmas, lol. I'm waiting, impatiently, for a week or so to be sure the silicon and glue is completely cured before moving animals in. Thanks for looking!
__________________
Science. It reduces the stupid.
|
|
|
|
|
11-12-16, 08:33 AM
|
#9
|
|
Forum Moderator
Join Date: Jan-2014
Posts: 4,329
Country: 
|
Re: FW's (mostly) DIY Snake Room. (Pic heavy)
looks great  nice project
__________________
Aho ni toriau baka!- Baka wa shinanakya naoranai...
|
|
|
|
|
01-01-17, 01:11 PM
|
#10
|
|
Member
Join Date: Mar-2014
Location: Victoria, TX
Age: 40
Posts: 774
Country:
|
New pics for a new year
Happy new year y'all. Here's a little Diamondback Water Snake celebrating only its second new year. Its new years resolution is to eat lots of rats and poop in its water bowl at least a couple times a week, just so I have to clean it up.
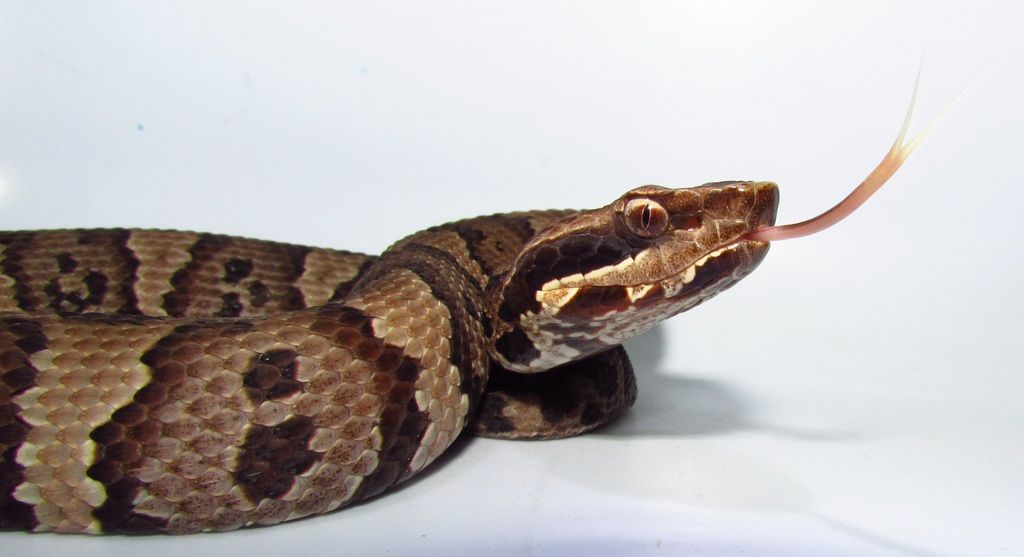
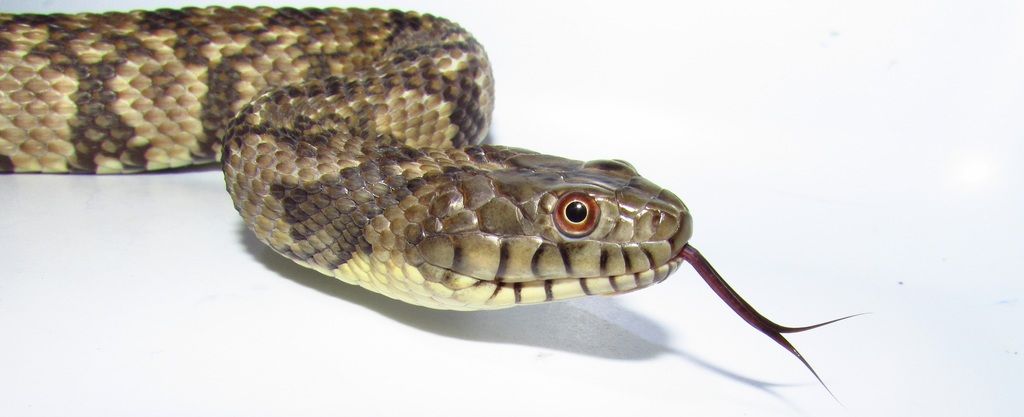
Joe the Cottonmouth is enjoying its first new year, to celebrate it will be getting a tasty fuzzy mouse later today.
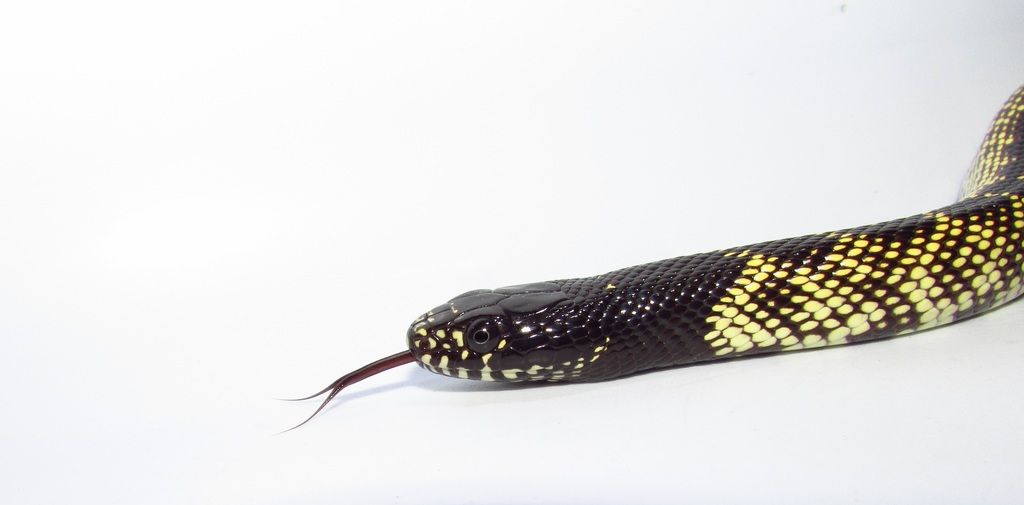
Desert Kingsnake
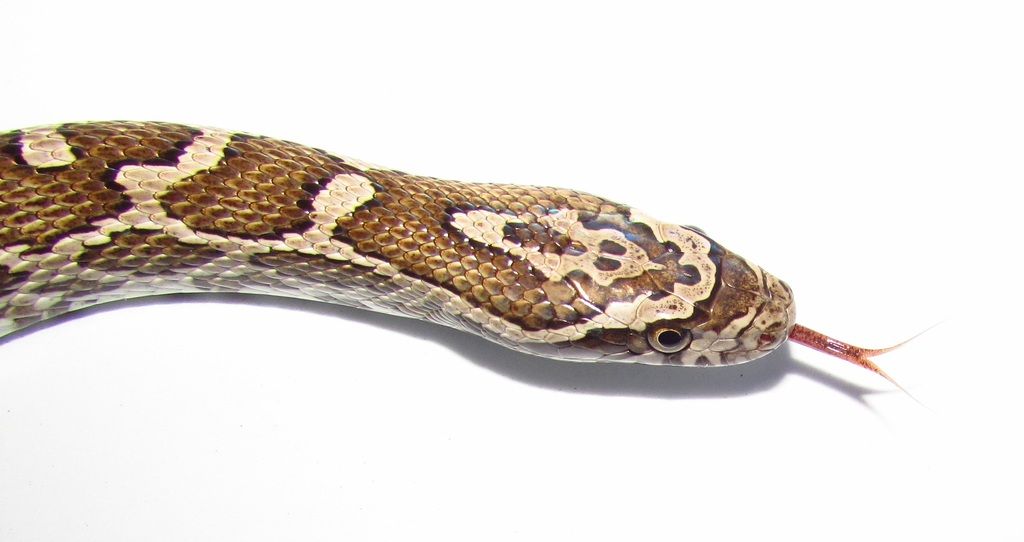
Emory's Rat Snake
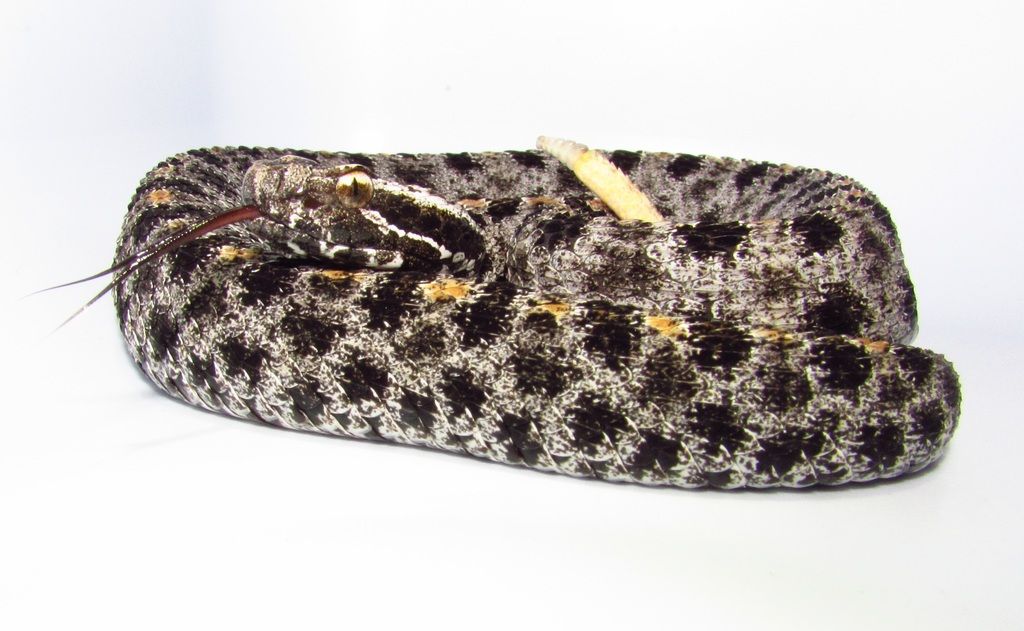
Dusky Pygmy Rattlsnake
Currently in progress, a new enclosure for the Dumeril's Boa. Dimensions are 56 inches wide, 30 inches deep, and 13.5 inches tall. Designed to fit perfectly in the closet in the snake room, it should be plenty large enough for the rest of the Boas life. I'm just test fitting it here before starting to paint it with polyurethane. Once it's done I'll be building another that will be two feet tall, it will house the Taiwanese Beauty. I did buy myself that table saw for Christmas, it made cutting out this enclosure a breeze compared to using the circular saw. Definitely should have bought a table saw a long time ago, ha.
__________________
Science. It reduces the stupid.
|
|
|
|
|
01-01-17, 01:17 PM
|
#11
|
|
Member
Join Date: Dec-2014
Location: Ontario
Posts: 2,118
Country: 
|
Re: FW's (mostly) DIY Snake Room. (Pic heavy)
Nice builds for sure, I'm most likely going to attempt to build my own cage in the spring so I'll be checking this thread out and might have a few questions for tips.
__________________
1.0 Fire Ball Python (Mushu) 1.0 BCI (Banzai) 0.1 Jaguar Carpet Python (Ono) 1.0 SD Retic (Kaa) 0.1 1.0 Amazon Tree Boa (curly fry - unofficial) black and white cat (Nahla)
|
|
|
|
|
01-01-17, 03:06 PM
|
#12
|
|
Member
Join Date: Dec-2016
Posts: 5
Country: 
|
Re: FW's (mostly) DIY Snake Room. (Pic heavy)
Great thread thanks for sharing
|
|
|
|
|
03-18-17, 09:44 PM
|
#13
|
|
Member
Join Date: Mar-2014
Location: Victoria, TX
Age: 40
Posts: 774
Country:
|
Re: FW's (mostly) DIY Snake Room. (Pic heavy)
The hatchling Eastern Coachwhip is coming along beautifully, though it really doesn't appreciate having its picture taken.
The juvenile Western Rat Snake is developing some beautiful, though subtle, coloring. I suspect it is going to darken considerably with age. Only time will tell.
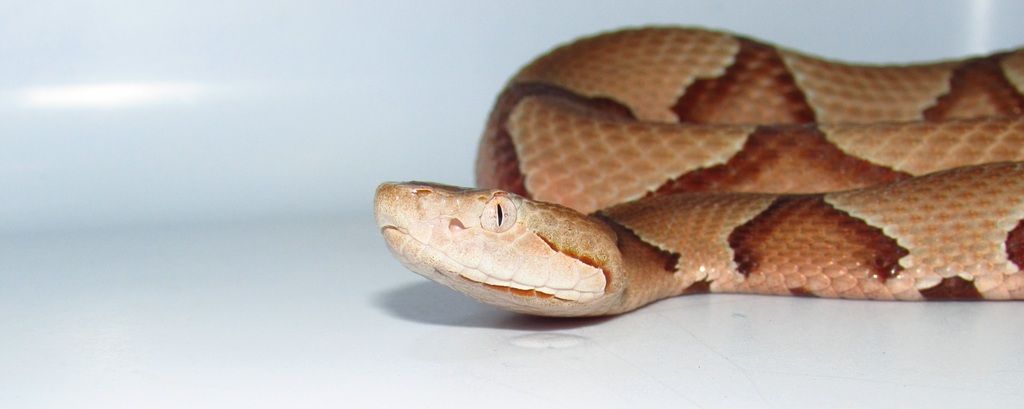
Eastern Copperhead glares at the camera.
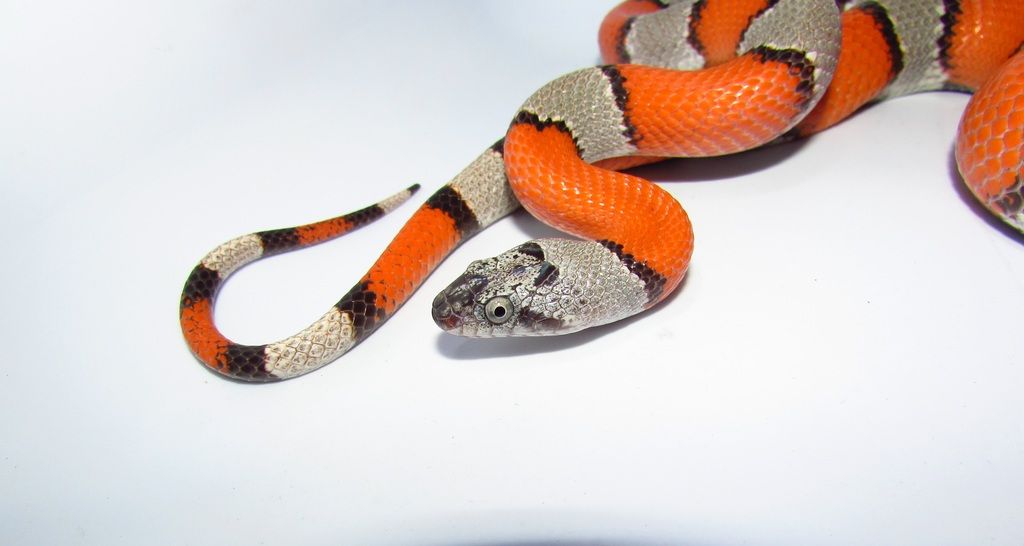
Red Bull Snake looking very red.
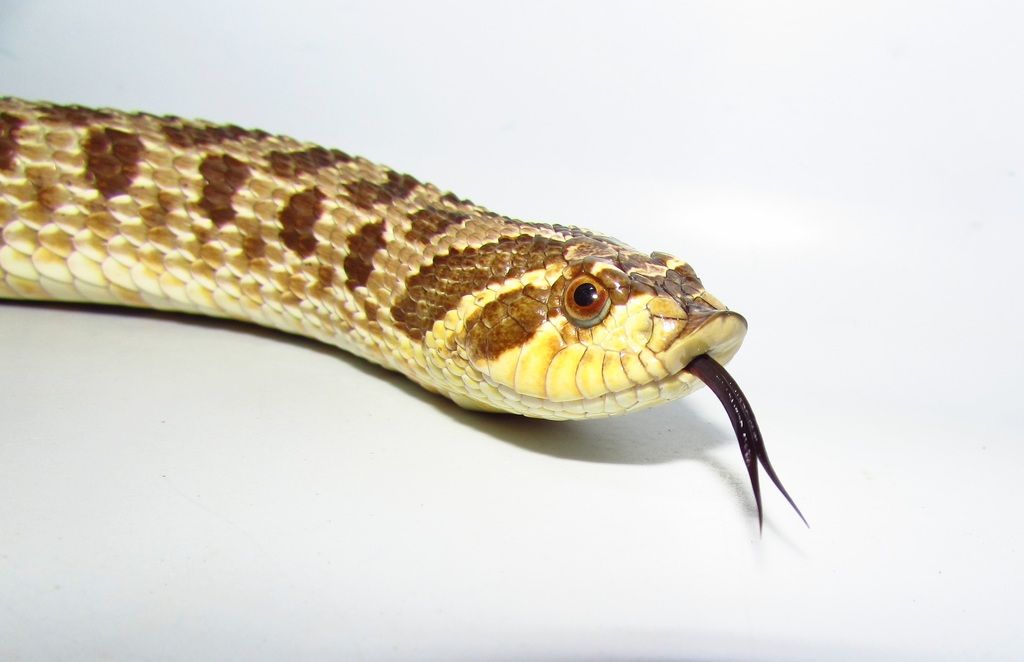
Western Hognose portrait.
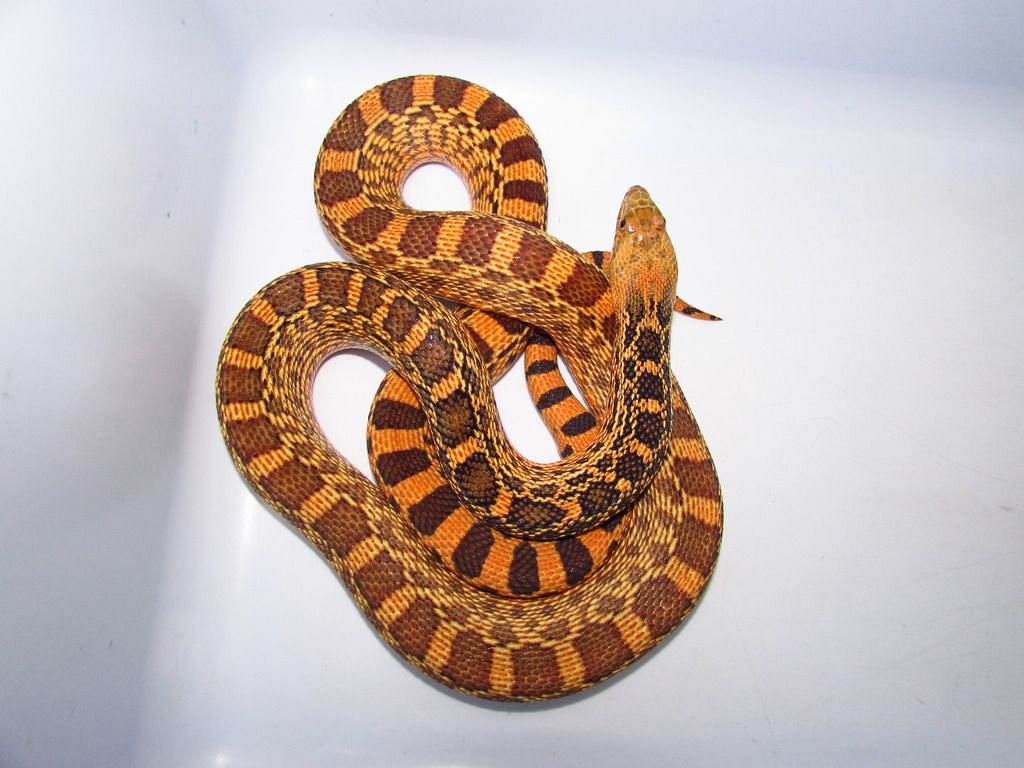
The Gray Banded Kingsnake is growing like a weed.
__________________
Science. It reduces the stupid.
|
|
|
|
|
03-19-17, 01:13 AM
|
#14
|
|
Member
Join Date: Mar-2017
Posts: 31
Country:
|
Re: FW's (mostly) DIY Snake Room. (Pic heavy)
really enjoyed this thread! what a beautiful collection (i've been spending too much time on facebook, i kept wanting to hit the like button) great builds!
|
|
|
|
|
03-20-17, 12:41 PM
|
#15
|
|
Member
Join Date: Feb-2017
Location: Chicago
Posts: 98
Country:
|
Re: FW's (mostly) DIY Snake Room. (Pic heavy)
Interesting read, thanks. How strong are the golf club hooks? Will they work for turning over some rocks and branches? I'm planning on doing some helping in phoenix... I don't want to use my hands too much asI'm not 100% familiar with all species there.
__________________
0.1 Beardie "Skipper"
|
|
|
|
 Posting Rules
|
You may not post new threads
You may not post replies
You may not post attachments
You may not edit your posts
HTML code is Off
|
|
|
All times are GMT -6. The time now is 05:16 AM.
Powered by vBulletin®
©2000 - 2025, Jelsoft Enterprises Ltd.

Copyright © 2002-2023, Hobby Solutions.
|
 |


 Hybrid Mode